Small Kitchen Organization: 14 Zero-Counter-Space Hacks
This post may contain affiliate links. If you buy through them, we may earn a small commission at no extra cost to you.
A small kitchen doesn't have a space problem. It has a counter problem. Everything — the dish rack, the spice jars, the knife block, the fruit bowl, the appliance you use twice a year — is competing for the same two feet of flat surface, and cooking in the middle of it feels like surgery.
The fix isn't more counter. It's moving everything that doesn't need to be flat onto the five surfaces you're ignoring: walls, doors, the insides of cabinets, the space above the sink, and the air above your counters. These 14 hacks do exactly that. Every one is rental-safe, most cost under $25, and none of them ask you to "just declutter" your way out of a kitchen that's genuinely too small.
1. An over-sink dish rack (the single biggest win)
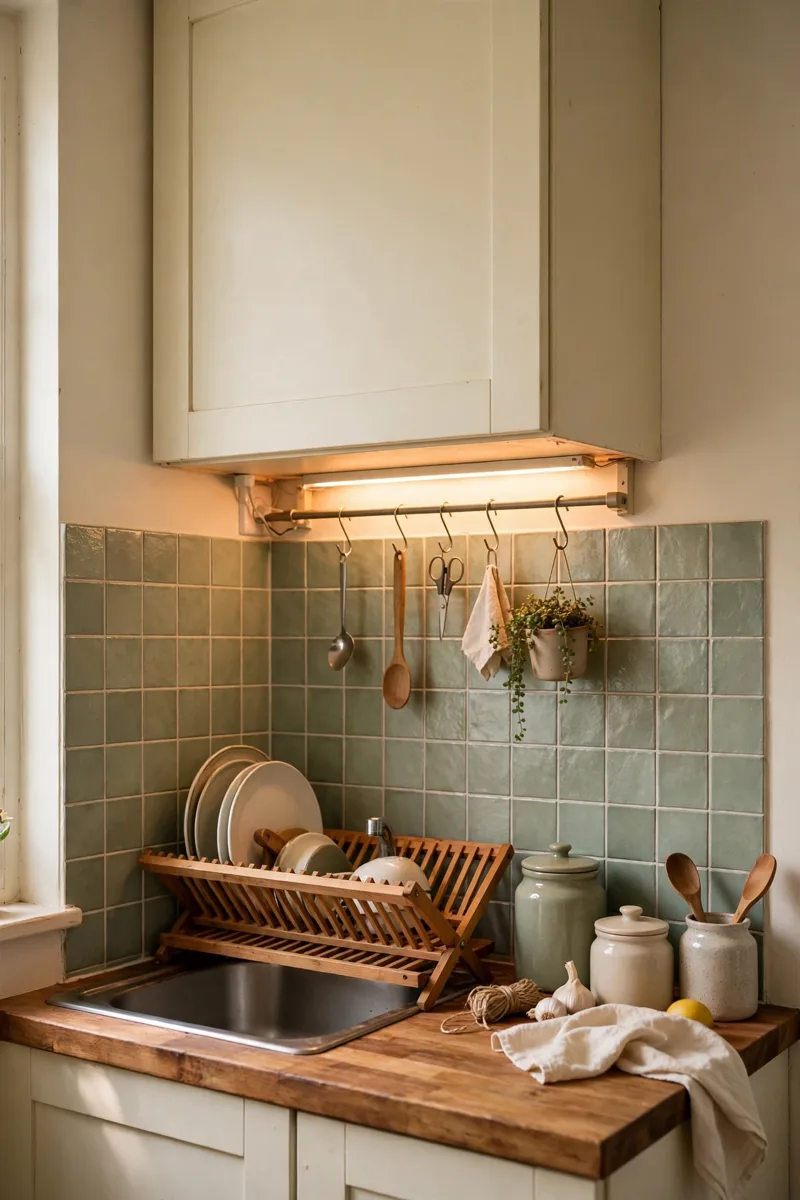
A roll-up or rack-style dish drainer that spans the sink frees the entire stretch of counter your old rack was eating — often 20% of your total workspace. Dishes drip straight into the sink, and roll-up versions disappear into a drawer when guests come. Cost: $15–$30.
2. A magnetic knife strip (adhesive-mounted)
Knife blocks are counter hogs. A magnetic strip mounted with heavy-duty adhesive strips (or inside a cabinet door, if your lease is strict) holds knives, scissors and metal utensils on the wall instead. Keep it out of splash range of the stove. Cost: $12–$20.
3. Peel-and-stick rail + hooks under the cabinets
An adhesive rail under your upper cabinets with S-hooks holds mugs, measuring cups and everyday utensils right where you cook — the same trick we use across the whole apartment in our renter-friendly decor guide. Nothing on the counter, everything in reach. Cost: $10–$18.
4. Tension rod inside the cabinet for cleaning bottles
A small tension rod across the under-sink cabinet lets spray bottles hang by their triggers, doubling the usable space below them. It also works across a deep cabinet to stop baking trays and cutting boards from avalanching. Cost: $6–$10.
5. Cabinet-door organizers
The inside of every cabinet door is free real estate: slim adhesive or over-door racks for spice packets, foil and wrap, pot lids, and measuring spoons. Three doors = a whole extra cabinet you didn't know you had. Cost: $8–$15 per door.
6. A tiered stand turns one layer into three
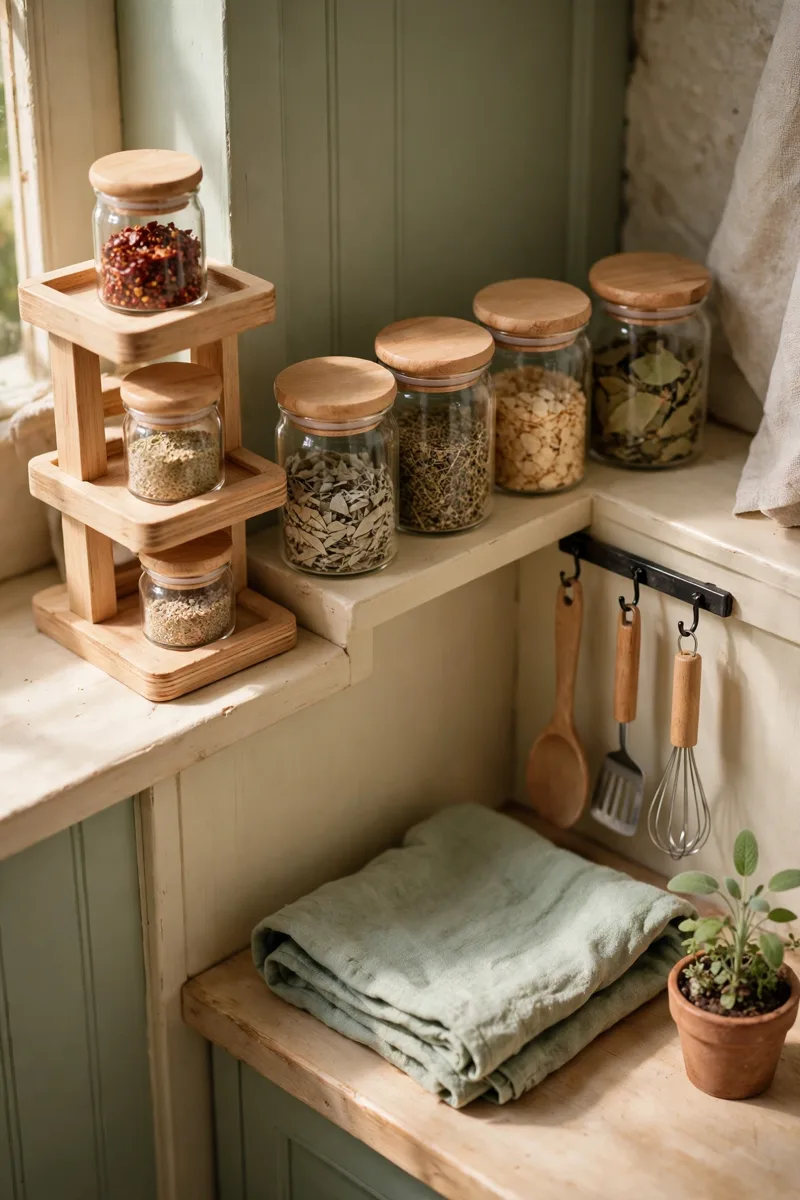
Spices, oils and jars belong on a tiered riser or a turntable, not in a crowd where you can only see the front row. One $12 riser inside a cabinet or in a counter corner triples what fits in the same footprint — and ends the buying-a-third-cumin problem. Cost: $10–$16.
7. Stack the sink zone vertically
A two-tier rack beside (not on) the sink for soap, sponge and scrub brushes, with a small rail for the dish towel. The sink surround goes from swamp to station. Cost: $12–$20.
8. Use the side of the fridge
Magnetic spice tins, a magnetic paper-towel holder, magnetic hooks for oven mitts — the fridge's side panel is a storage wall that came free with your apartment. Renters: magnets leave nothing behind. Cost: $10–$25.
9. A rolling cart in the gap
That 8-inch gap between fridge and counter, or stove and wall, fits a slim rolling cart: oils and spices below, produce on top. It pulls out when you cook and vanishes when you don't. Measure your gap first — carts come in 5", 7" and 9" widths for a reason. Cost: $25–$45.
10. Hooks on the inside of the pantry or closet door
No pantry? A nearby closet door with an over-door rack becomes one — cans, snacks and backup supplies in clear rows. If there's genuinely no door, a single over-door rack on the kitchen entry works the same. Cost: $15–$30.
11. Decant the five things you use daily
Flour, rice, pasta, oats, coffee: into matching stackable jars, everything else stays in its bag in a bin. Matching jars aren't about looks — stackable shapes waste zero air between them, and you can see at a glance what's running out. Cost: $15–$30 for a set.
12. A cutting board that lives over the sink or stove
An over-sink cutting board creates counter space exactly when and where you need it, then leans against the backsplash when you don't. Bamboo ones double as serving boards. Cost: $15–$25.
13. One appliance garage corner
Toaster, kettle, blender: pick ONE corner, give them a tray, and let that be the appliance zone. Everything else earns counter space daily or it lives in a cabinet. The tray matters — it makes the cluster look deliberate instead of stored. Cost: $8–$15.
14. Light under the cabinets
Adhesive light strips under upper cabinets don't add storage — they add usable space, because you can finally see the back of your own counter. Half the "I need more room" feeling is really "I can't see what I have." Cost: $12–$22.
Renters, one caution before you shop
Half the "small kitchen organization" products sold online assume you can screw into walls and cabinet frames. You probably can't — and you don't need to. Everything in this guide mounts with adhesive, magnets, tension or gravity, deliberately. When you do use adhesive products, three rules keep them deposit-safe: clean the surface with rubbing alcohol and let it dry before applying (grease is the silent cause of most "adhesives don't work" stories), respect the stated weight limit at half value for anything above a counter where a fall means broken glass, and give strips their full cure time — usually 24 hours — before loading them. Removal is the reverse of your patience level: slow peel, a little hair-dryer warmth, no yanking. Organized and deposit-safe are not in conflict; they're the same shopping list, read carefully.
The order to do these (one hour, biggest wins first)
- Over-sink rack (Hack 1) — 10 minutes, biggest surface back
- Cabinet doors (Hack 5) — 15 minutes
- Tiered stand + decanting (Hacks 6 + 11) — 20 minutes
- Under-cabinet rail and light (Hacks 3 + 14) — 15 minutes Everything else is weekend-two material.
FAQ
How do I organize a kitchen with almost no cabinets? Go vertical and go mobile: wall rails, magnetic storage, a rolling cart, and over-door racks replace missing cabinets. Hacks 3, 8, 9 and 10 are built for exactly this.
What should never live on a small kitchen counter? Anything used less than daily: the blender, the stand mixer, the fruit bowl (hang fruit in a door basket instead), and mail. Counters are for cooking, not storage.
Are adhesive organizers really rental-safe? Quality adhesive rails and strips rated for the weight, applied to clean smooth surfaces and removed with heat and a slow peel, come off clean. Patch-test inside a cabinet first, and never stick anything to peeling paint.
What's the best first $20 to spend? The over-sink rack. It returns the most counter per dollar of anything on this list.
Small kitchen, working kitchen
You don't need a bigger kitchen — you need your counters back. Start with the one-hour order above, then keep going with the same no-drill logic we use in the entryway storage guide. And before you buy organizers, walk your kitchen with the free Renter-Friendly Makeover Checklist so the sizes and the budget are decided first.
Get the Free Renter-Friendly Makeover Checklist
Room-by-room no-drill steps, a budget tracker and a move-out undo log — free PDF, no email needed.
Download the Free Checklist